The Importance of Listening Levels
How loud do you listen when you compose, record, mix or master your music? And do you always work at the same volume or just turn up your monitors until you hit a comfortable level?
Quite probably, like a great many people working in all sorts of music production environments, from home studio rooms to commercial recording spaces, the truth is closer to the latter than the former. You just turn it up until it sounds about right on that particular day, and that might not be the same volume as the day before. But if that is how you work, you’re missing a trick, one that could improve the consistency and quality of your work. Here’s why.
Human hearing is complex, really very complex. And one of the immense complexities of how the ear and brain respond to audio signals is that their output, the sensation we call sound, changes depending on volume level. You perceive different qualities in a sound depending on how loud it is. Perhaps the most familiar illustration of the complexity of hearing is something called the Fletcher-Munson equal loudness curve. It’s also the one that has the most obvious implications for the importance of considering monitoring levels.
The Fletcher-Munson curve dates from work done in the 1930s and has been revised and refined a number of times since (in particular by Robinson and Dadson in 1956), with the most recent revision being published in a 2003 international standard (ISO 226). But the principle of Fletcher-Munson still holds true and it illustrates how our perception of sound changes in terms of frequency balance at different volume levels. At relatively quiet volumes, the level required for, say, 100 Hz and 10 kHz to be perceived as equally as loud as the level at 1 kHz needs to be around 10 dB higher. As volume increases however, the difference between perceived loudness at different parts of the audible frequency spectrum reduces. You can do a simple experiment to prove this for yourself. Play some pink noise through your monitoring system, starting with the volume level very low. As you slowly increase the volume you’ll hear low and high frequencies become more apparent. This is the Fletcher-Munson curve in action.
The implication that this has for recording, mixing and mastering is obvious: unless you work at a consistent volume, the decisions you make about tonal balance are likely to be inconsistent. But there’s more. Your ear and brain also adapt in their perception of volume depending on the recent history of sound pressure level. We’ve all experienced going to a gig and, as the band blasts into the first song, thinking, “Wow that’s loud! Not sure how long I’ll be able to stand it.” And then, after a few minutes, it doesn’t seem so loud anymore. This is not because the front of house mix engineer has noticed your discomfort and knocked 6dB off the volume, it’s because your brain has re-calibrated its input sensitivity. So again, if you work in a studio at too high a level, your creative decisions may well turn out to be flawed when the material is played at a more sensible level. There’s also a stress reaction to high volumes that results in raised blood pressure, increased heart rate and tiredness. And that too is bound to distort your working decisions. In the film and broadcast industries, the concept of fixed reference replay volume levels is well established and there’s very good reasons for this. Not only is it vital that audiences can both hear everything yet not be deafened, it’s important that movie and broadcast mix studios reflect the volume levels that are typically used in theaters and homes.
So that’s the problem: your ears and brain respond to changes in audio volumes in a complex manner over which you have no control. However, you do have control over your working volume and if you develop a consistent volume level strategy you’ll stand a better chance of delivering consistent work. You’ll also develop a more disciplined approach to working; not randomly cranking-up the volume and getting overly excited, and not suffering fatigue from listening too loud for too long. We’d suggest the following volume level setup procedure:
- Establish and measure your preferred working volume level at your usual listening position by playing material that’s typical of your work and doesn’t vary much in level. Although an inexpensive SPL meter is best for this job, it’s not absolutely necessary because a smartphone sound level app will do. Set the meter or app to measure dB(C) with a slow response time. If dB(C) is not available, dB(A) can also be used. Hold the meter or smartphone at the listening position and make a note of the average volume level. Give the measurement time to settle down. A figure between 70 dB and 75 dB would be reasonable for nearfield (say, between 1.5 and 2 m) monitoring in a relatively small space, however if your smartphone app is un-calibrated you may see something different. That doesn’t really matter however because all you need to be able to do is make comparative measurements.
- Now look at the positions of the DAW output fader and the monitor volume control. Make note of both of them – maybe make a mark on the monitor volume control. These are now your primary reference volume positions. Every time you work, set the DAW output fader and the monitor volume control initially to these positions.
- Now think about the kind of music you typically make. Is your specialty acoustic folk, big band jazz, ambient electronica or EDM for example? What kind of volume level are the consumers of your work are likely to listen at? If your work is most likely to be consumed at a quieter level than your primary reference working volume, give yourself another reference position on the monitor volume control that measures, say 6 dB to 8 dB quieter. You can then use that as a secondary reference to check how things sound at a lower volume. Conversely, if your music is likely to be consumed at a level higher than your primary reference volume level, give yourself another volume reference that’s maybe 6 dB to 8 dB higher. Again, use the monitor volume control and mark the level.
Having reference volume levels need not be restrictive. You’re still free to listen and work at any volume you like. But if you have fixed references that you can refer back to, and use perhaps for a critical final mix checks, you’ll have taken an important, yet often unappreciated, variable out of the audio engineering equation.
Top Posts
You might like
-
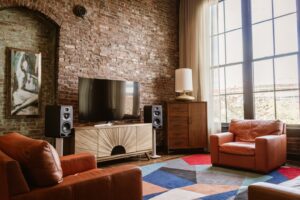
Hi-Fi Speakers vs Studio Monitors – What’s the difference?
If you’re reading this blog post it’s a reasonable assumption that you own a pair of professional monitors and they’re installed in your studio; be that a bedroom in your house or a generously equipped high-end control room. But in your living room, in the kitchen or perhaps in the…
-
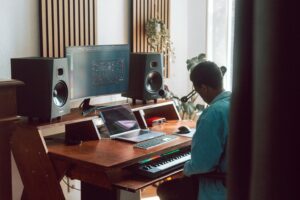
The Complexity of Listening
Our blog articles primarily cover audio production technology and techniques, but for this article we’re going to turn the attention from hardware and software to the “human-ware”. We will explore how we listen, and how we can better understand what we hear. Listening is of course the endgame of music…